Setup Google sso in React Native Expo
Step 0: Prerequisites
Check for the node version, should be >=20.18.0
Step 1: Create new react native expo project
let's name it demo-app
npx create-expo-app@latest -y demo-app
cd demo-app
Step 2: Create pre build
npx expo prebuild --clean
Learn more https://docs.expo.dev/guides/adopting-prebuild/
Step 3: Install dependencies
npm i @react-native-firebase/app @react-native-firebase/auth @react-native-google-signin/google-signin expo-build-properties
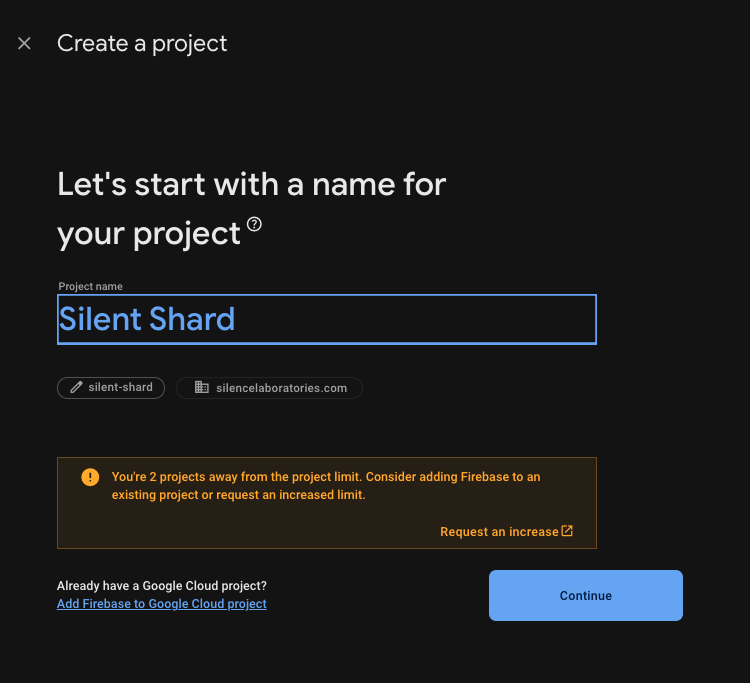
Step 4: Create firebase project
https://console.firebase.google.com/
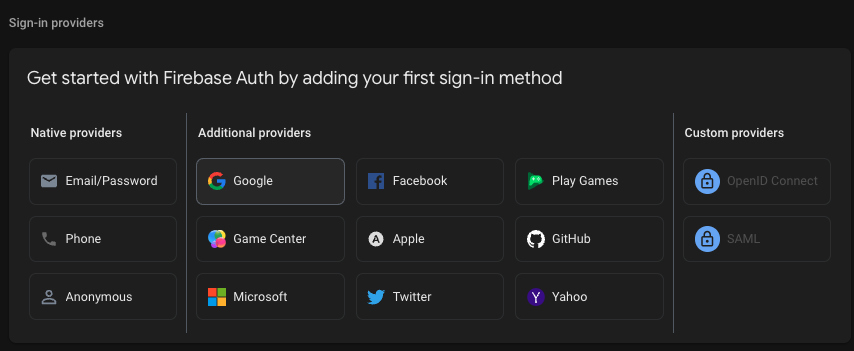
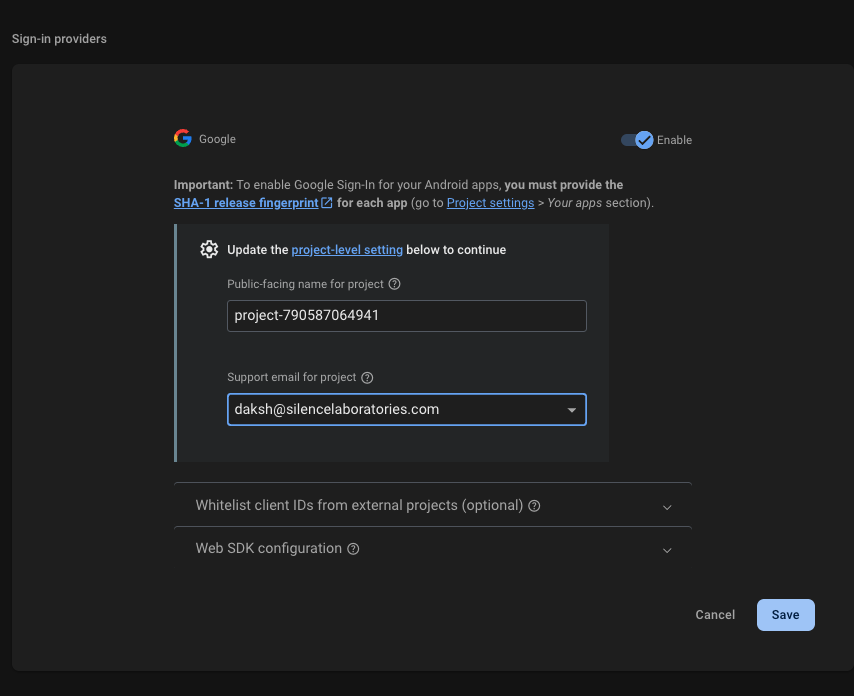
Step 5: Enable google authentication on firebase console
https://console.firebase.google.com/project/silent-shard/authentication
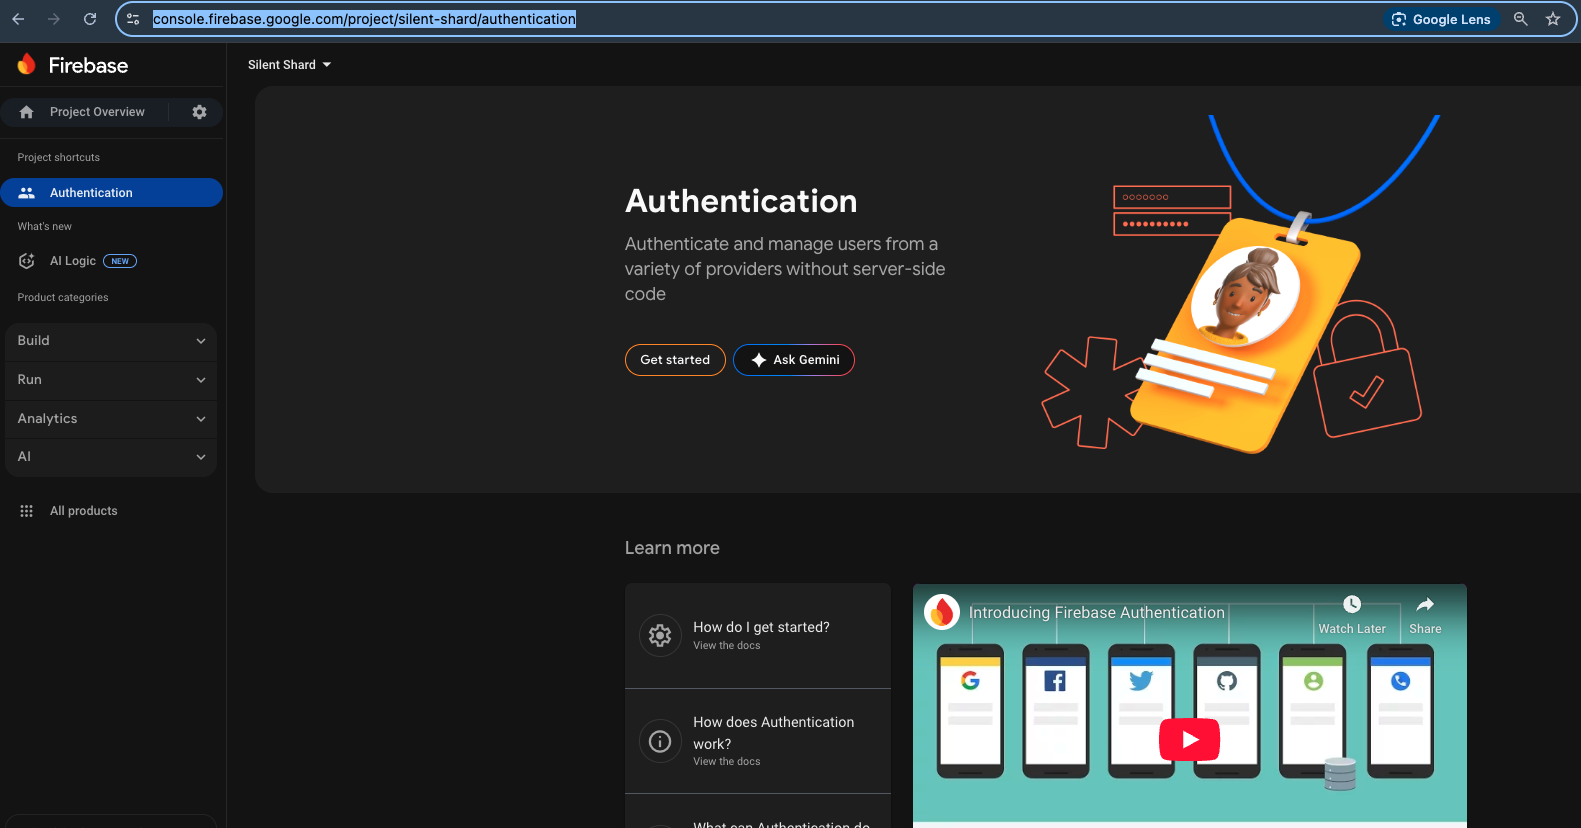
Enable google authentication on firebase console.
Continue to the next step.
Step 6: iOS setup for google authentication.
Step 6.1: Get bundle id
You can get the bundle id from app.json in expo::ios::bundleIdentifier.
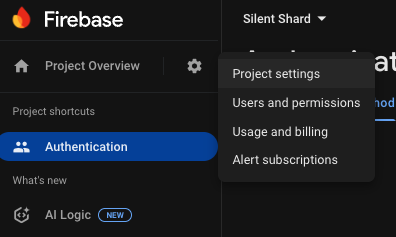
Step 6.2: Open project settings on firebase console.
Step 6.3: Create ios app on firebase project settings,
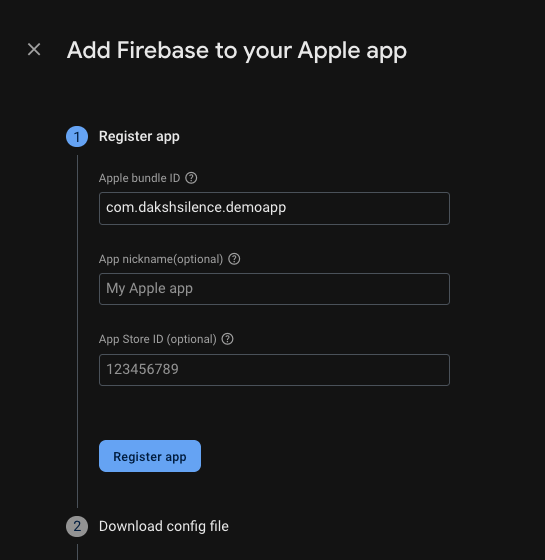
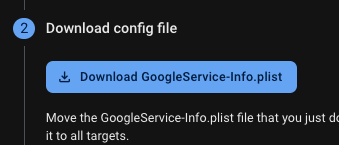
Step 6.4: Download the GoogleService-Info.plist and paste it in the root of the project.
Continue and create the ios app on firebase project settings.
Step 6.5: Add googleServicesFile in app.json in
{
  "expo": {
    "ios": {
      "googleServicesFile": "./GoogleService-Info.plist"
    }
  }
}
Step 7: Android setup for google authentication.
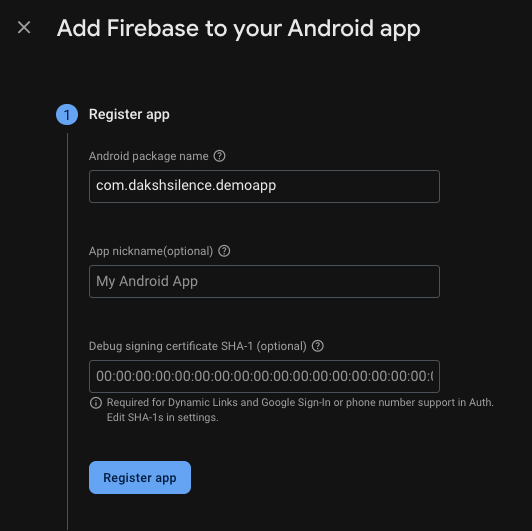
Step 7.1: Get package name
Get the package name from app.json in expo::android::package.
Step 7.2: Get the sha1 by running the following command in the root of the project.
cd android && ./gradlew signingReport
You will see the list of sha1, choose the one that has Store value as your project path.
Step 7.3: Open project settings.
Step 7.4: Create android app on firebase project settings,
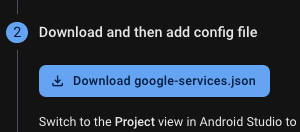
Step 7.5: Download the google-services.json and paste it in the root of the project.
Continue and create the android app on firebase project settings.
Step 7.6: Add googleServicesFile in app.json in
{
  "expo": {
    "android": {
      "googleServicesFile": "./google-services.json"
    }
  }
}
Step 8: Add plugins in app.json
{
  "expo": {
    "plugins": [
      "@react-native-firebase/app",
      [
        "expo-build-properties",
        {
          "ios": {
            "useFrameworks": "static",
            "deploymentTarget": "16.0"
          }
        }
      ],
    ]
  }
}
Step 9: Create pre build again.
npx expo prebuild --clean
Learn more https://docs.expo.dev/guides/adopting-prebuild/
Step 10: Create services
Create a folder services in the root of the project where we will store the all code.
mkdir services
Step 11: Create FirebaseAuthService.ts
Create a file FirebaseAuthService.ts in the services folder.
Show FirebaseAuthService.ts code
import auth from '@react-native-firebase/auth';
import { GoogleSignin } from '@react-native-google-signin/google-signin';

export interface AuthUser {
  uid: string;
  email: string | null;
  displayName: string | null;
  photoURL: string | null;
}

export class FirebaseAuthService {
  private static instance: FirebaseAuthService;

  private constructor() {
    this.configureGoogleSignIn();
  }

  public static getInstance(): FirebaseAuthService {
    if (!FirebaseAuthService.instance) {
      FirebaseAuthService.instance = new FirebaseAuthService();
    }
    return FirebaseAuthService.instance;
  }

  private configureGoogleSignIn() {
    GoogleSignin.configure({
      webClientId: '<your web client id>.apps.googleusercontent.com',
      iosClientId: '<your ios client id>.apps.googleusercontent.com',
      offlineAccess: true,
    });
  }

  /**
   * Sign in with Google and authenticate with Firebase
   */
  public async signInWithGoogle(): Promise<AuthUser | null> {
    try {
      // Check if Google Play Services are available
      await GoogleSignin.hasPlayServices({ showPlayServicesUpdateDialog: true });

      // Sign in with Google first
      await GoogleSignin.signIn();

      // Get the tokens after successful sign in
      const tokens = await GoogleSignin.getTokens();
      const { idToken } = tokens;

      // Create a Google credential with the token
      const googleCredential = auth.GoogleAuthProvider.credential(idToken);

      // Sign-in the user with the credential
      const userCredential = await auth().signInWithCredential(googleCredential);

      const user = userCredential.user;
      console.log('✅ Firebase Auth: Successfully signed in user:', user.email);

      return {
        uid: user.uid,
        email: user.email,
        displayName: user.displayName,
        photoURL: user.photoURL,
      };
    } catch (error) {
      console.error('❌ Firebase Auth: Sign in error:', error);
      throw error;
    }
  }

  /**
   * Sign out the current user
   */
  public async signOut(): Promise<void> {
    try {
      // Sign out from Google
      await GoogleSignin.signOut();

      // Sign out from Firebase
      await auth().signOut();

      console.log('✅ Firebase Auth: User signed out successfully');
    } catch (error) {
      console.error('❌ Firebase Auth: Sign out error:', error);
      throw error;
    }
  }

  /**
   * Get the current Firebase user
   */
  public getCurrentUser(): AuthUser | null {
    const user = auth().currentUser;
    if (!user) return null;

    return {
      uid: user.uid,
      email: user.email,
      displayName: user.displayName,
      photoURL: user.photoURL,
    };
  }

  /**
   * Get the Firebase ID token for the current user
   * This is what you need to send to your backend
   */
  public async getFirebaseIdToken(): Promise<string | null> {
    try {
      const user = auth().currentUser;
      if (!user) {
        console.warn('🔒 Firebase Auth: No user signed in');
        return null;
      }

      // Get the Firebase ID token (this is what your backend expects)
      const idToken = await user.getIdToken();
      console.log('🔑 Firebase Auth: Got Firebase ID token');
      return idToken;
    } catch (error) {
      console.error('❌ Firebase Auth: Error getting ID token:', error);
      return null;
    }
  }

  /**
   * Get a fresh Firebase ID token (force refresh)
   */
  public async getFreshFirebaseIdToken(): Promise<string | null> {
    try {
      const user = auth().currentUser;
      if (!user) {
        console.warn('🔒 Firebase Auth: No user signed in');
        return null;
      }

      // Force refresh to get a new token
      const idToken = await user.getIdToken(true);
      console.log('🔑 Firebase Auth: Got fresh Firebase ID token');
      return idToken;
    } catch (error) {
      console.error('❌ Firebase Auth: Error getting fresh ID token:', error);
      return null;
    }
  }

  /**
   * Check if user is currently signed in
   */
  public isSignedIn(): boolean {
    return auth().currentUser !== null;
  }

  /**
   * Listen to authentication state changes
   */
  public onAuthStateChanged(callback: (user: AuthUser | null) => void): () => void {
    return auth().onAuthStateChanged((firebaseUser) => {
      if (firebaseUser) {
        const user: AuthUser = {
          uid: firebaseUser.uid,
          email: firebaseUser.email,
          displayName: firebaseUser.displayName,
          photoURL: firebaseUser.photoURL,
        };
        callback(user);
      } else {
        callback(null);
      }
    });
  }
}

// Export a singleton instance
export const firebaseAuth = FirebaseAuthService.getInstance();
Step 12: Update webClientId and iosClientId
Update the webClientId and iosClientId in the onGoogleButtonPress.ts file.
- You can get the web client id from google-services.json,
{
   "client_id": "<your web client id>.apps.googleusercontent.com",
   "client_type": 3
}
- You can get the ios client id from GoogleService-Info.plist,
<dict>
	<key>CLIENT_ID</key>
	<string>Your ios client id</string>
</dict>
Step 13: Update app/(tabs)/index.tsx
index.tsx code
import { FirebaseAuthService } from "@/services/FirebaseAuthService";
import { Button, SafeAreaView } from "react-native";

export default function Index() {
  return (
    <SafeAreaView>
      <Button
        title="Sign in with Google"
        onPress={async () => {
          await FirebaseAuthService.getInstance().signInWithGoogle();
          const idToken =
            await FirebaseAuthService.getInstance().getFirebaseIdToken();
          console.log("🚀 idToken:", idToken);
        }}
      />
    </SafeAreaView>
  );
}
Step 14: Run the project
npx expo start
Run the project on ios and android, click Sign in with Google button and you will see the user details in the console.